Setting Up ABP With OpenIddict on Azure App Services
2022-08-29
In prep for building a SaaS product, I’ve been spending a lot of time the past couple of weeks getting familiar with ABP Framework. ABP builds on top of ASP.NET Core to provide “complete infrastructure to create modern web applications by following the best practices and conventions of software development.” As a solo dev, I don’t want to spend all of my time rebuilding common infrastructure, so I’m relying on ABP to provide that for me so I can concentrate on business concerns.
The community is currently in a bit of flux around authentication, so I decided to jump in with the latest version, 6.0.0-rc3. This release switches from IdentityServer4 to OpenIddict for authentication. The gory details for this switch are available on GitHub.
Getting Started
I generated a new solution locally using ABP CLI.
abp new CenterStride -u blazor --previewThis generated a solution with a lot of projects. I passed -u to use Blazor as my front end and --preview to get the latest release candidate. ABP’s structure is pretty is pretty complicated, but I was focused only on getting the API project deployed to Azure as an App Service. The Blazor client will use this for project for authentication.
Naively deploying to the App Service without changing any OpenIddict configuration led to the following error
System.Security.Cryptography.CryptographicException:
The owner of '/home/.dotnet/corefx/cryptography/x509stores/my' is not the current user.`
This was one of the few times in my career that I Googled a .NET exception and came up with almost no results. Luckily, I was able to find an issue in the ABP repo to get started.
Why Do We Need Certificates
OpenIddict is a solution to implement OpenID Connect client, server, and token validation in .NET. As part of this, it uses two types of credentials, encryption and signing.
- Signing credentials are used to protect against tampering. They can be either asymmetric (e.g a RSA or ECDSA key) or symmetric.
- Encryption credentials are used to ensure the content of tokens cannot be read by malicious parties. They can be either asymmetric (e.g a RSA key) or symmetric.
For local development, I was using the default development and encryption certificates. ABP turns those on by default, but they don’t work in Azure.
Generating Certificates
OpenIddict helpfully provides some code to generate certificates. The samples use empty passwords, but this won’t work in Azure. Azure requires that your certificates be generated with a password. I generated an encryption certificate with
using var algorithm = RSA.Create(keySizeInBits: 2048);

var subject = new X500DistinguishedName("CN=Fabrikam Encryption Certificate");
var request = new CertificateRequest(
    subject, algorithm, HashAlgorithmName.SHA256, RSASignaturePadding.Pkcs1);
request.CertificateExtensions.Add(
    new X509KeyUsageExtension(X509KeyUsageFlags.KeyEncipherment, critical: true));

var certificate = request.CreateSelfSigned(DateTimeOffset.UtcNow, DateTimeOffset.UtcNow.AddYears(2));

File.WriteAllBytes("encryption-certificate.pfx",
    certificate.Export(X509ContentType.Pfx, <INSERT_PASSWORD_HERE>));
And a signing certificate with
using var algorithm = RSA.Create(keySizeInBits: 2048);

var subject = new X500DistinguishedName("CN=Fabrikam Signing Certificate");
var request = new CertificateRequest(
    subject, algorithm, HashAlgorithmName.SHA256, RSASignaturePadding.Pkcs1);
request.CertificateExtensions.Add(
    new X509KeyUsageExtension(X509KeyUsageFlags.DigitalSignature, critical: true));

var certificate = request.CreateSelfSigned(DateTimeOffset.UtcNow, DateTimeOffset.UtcNow.AddYears(2));

File.WriteAllBytes("signing-certificate.pfx",
    certificate.Export(X509ContentType.Pfx, <INSERT_PASSWORD_HERE>));
THESE EXAMPLES ARE NOT IDENTICAL. I missed this myself when initially generating the certificates. Each certificate uses a different value for X509KeyUsageFlags. I accidentally generated both of them with KeyEncipherment. The encryption certificate loaded correctly, but I got the following error when trying to load the signing certificate. Generating the signing certificate correctly with a value of DigitalSignature fixed the error.
---> System.InvalidOperationException: The specified certificate is not a signing certificate.
at Microsoft.Extensions.DependencyInjection.OpenIddictServerBuilder.AddSigningCertificate(X509Certificate2 certificate)
Uploading Certificates
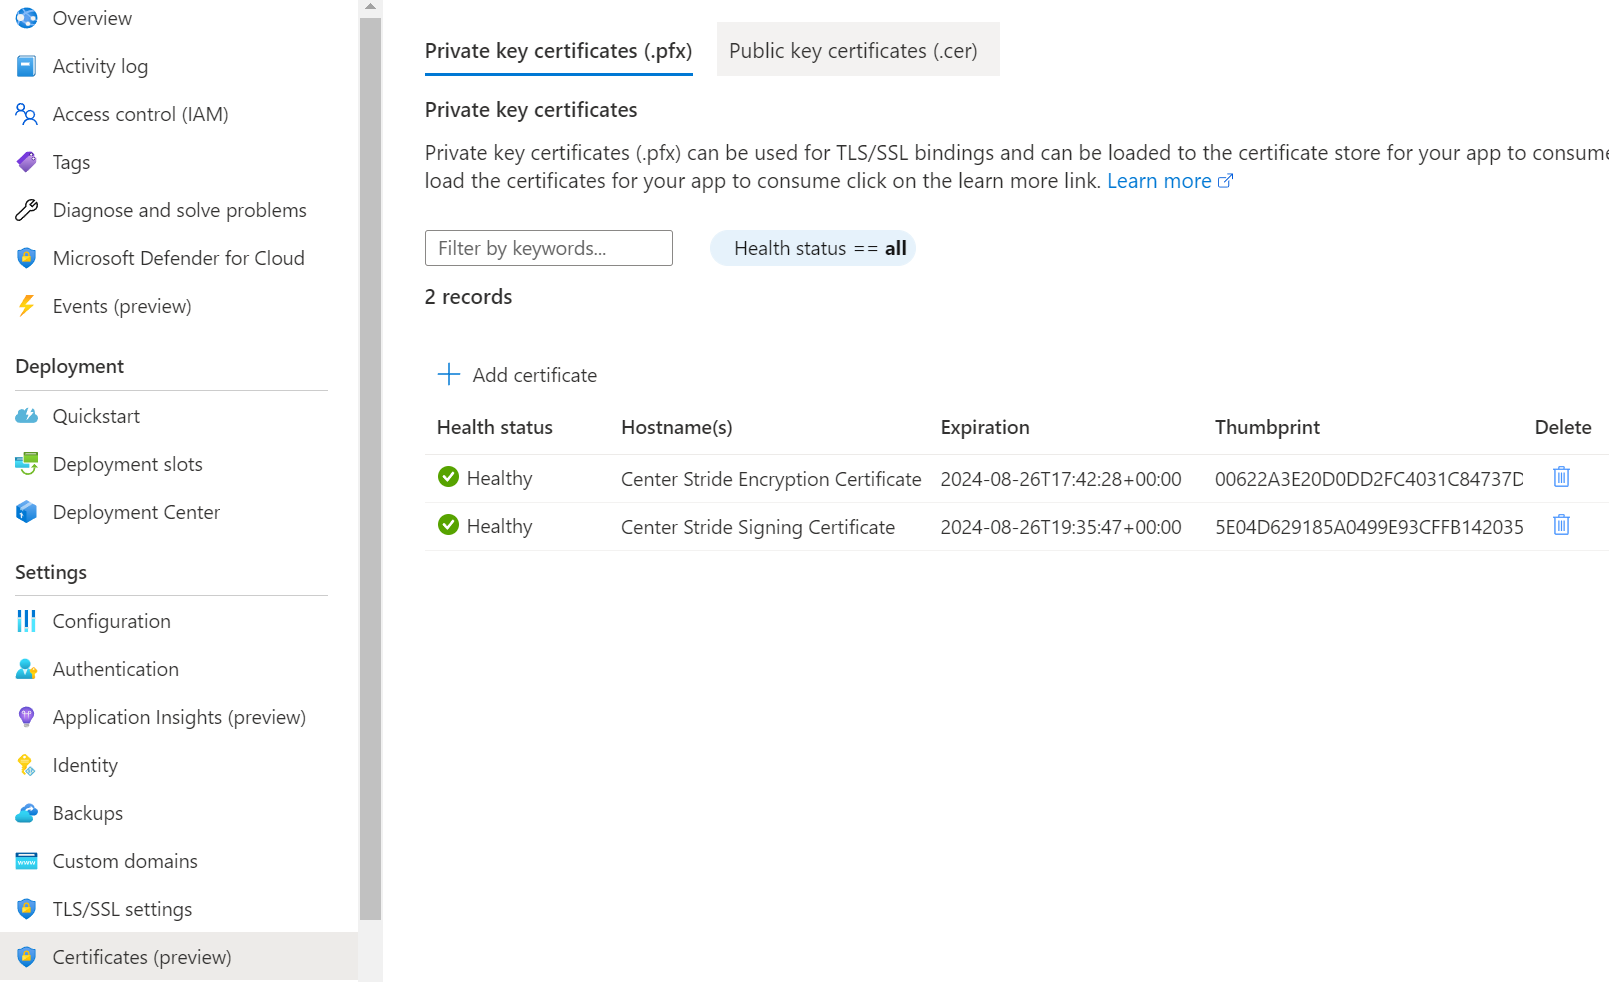
Now that I had generated by encryption and signing certificates, I needed to upload them to Azure. Luckily, the documentation for this is pretty good. Go to your Azure App Service and either navigate to TLS/SSL Settings -> Private Key Certificates like in the the docs, or go directly to Certificates (preview). From there you can upload each certificate.
Note the thumbprint of each certificate for later. You will need it load the certificate at runtime.
Loading Certificates
Out of the box, ABP’s OpenIddictServerModule is using OpenIddict’s default certificates, but I needed to load the certificates I had generated and uploaded to Azure instead.
The way certificates are loaded varies by App Service platform. I’m using Linux, but full instructions for both Windows and Linux platforms are available.
I started by making the certificates available to the App Service by running the command below. It sets the WEBSITE_LOAD_CERTIFICATES app setting for your Azure App Service. This controls what certificates will be available to your app.
az webapp config appsettings set --name <app-name> --resource-group <resource-group-name> \
    --settings WEBSITE_LOAD_CERTIFICATES=<comma-separated-certificate-thumbprints>
I could have also used the App Service’s Configuration screen in the Azure Portal. In either case, I had two certificates and I wanted to load both of them, so I used * instead of directly adding each thumbprint. If you want to be more selective, then you will need the individual thumbprints for each certificate that you want to load.
The final step was to customize my apps CenterStrideHttpApiHostModule to load the certificate. The Azure documentation once again was pretty good and showed the correct file path to use on each platform.
public override void PreConfigureServices(ServiceConfigurationContext context)
{
    var configuration = context.Services.GetConfiguration();
    var hostingEnvironment = context.Services.GetHostingEnvironment();

    PreConfigure<AbpOpenIddictAspNetCoreOptions>(options =>
    {
        if (hostingEnvironment.IsProduction())
        {
            //https://documentation.openiddict.com/configuration/encryption-and-signing-credentials.html
            options.AddDevelopmentEncryptionAndSigningCertificate = false;
        }
    });

    PreConfigure<OpenIddictServerBuilder>(options =>
    {
        if (hostingEnvironment.IsProduction())
        {
            options.AddEncryptionCertificate(LoadCertificate(
                configuration["AuthServer:EncryptionCertificateThumbprint"]));
            options.AddSigningCertificate(LoadCertificate(
                configuration["AuthServer:SigningCertificateThumbprint"]));
        }
    });

    ...
}

private X509Certificate2 LoadCertificate(string thumbprint)
{
    var bytes = File.ReadAllBytes($"/var/ssl/private/{thumbprint}.p12");
    return new X509Certificate2(bytes);
}
I added the thumbprints for each certificate to my appsettings.production.json. /var/ssl/private is the directory where those certificates can be loaded from because I earlier set the WEBSITE_LOAD_CERTIFICATES app setting.
Success!
With all of this done, I was able to deploy my ABP API app to my Azure App Service and successfully load certificates.
It took me an entire day to figure all of this out. That was partly due to unfamiliarity with both API and OpenIddict and silly mistakes on my part. I was able to get it all working though with a good understanding of each part. At multiple points I was confused enough that I was referring to both ABP and OpenIddict source code. When in doubt, pull down the code and dive in.
